External Client App for Webex Contact Center integration
Configure the External Client App for Webex Contact Center Salesforce Connector
To use Service Cloud Voice to its full extent, the Contact Center call flow can be adapted to create the Voice Call record and to execute a Salesforce Omni-Channel flow while the call is on the IVR.
There are two options to connect your Salesforce data with third-party applications. Both Connected Apps and External Client Apps are frameworks to integrate data. External Client Apps are the next generation of connected apps.
Pre-requisites
Configuration steps
The following configuration steps are required to enable Contact Center Flows and IVRs to connect to Service Cloud Voice:
- Create a Permission Set for the SCV Integration User
- Clone and modify the Profile Minimum Access - API Only Integrations
- Create a User: SCV Integration User
- External Client App
- Assign the Permission Set to the External Client App
Permission Set for the SCV Integration User
The following Permission Set grants access to Apex classes used by Connects for SCV for the integration with Contact Center IVR flows and b+s Connects for SCV
The following is an example configuration and describes the minimum required permissions for the Contact Center / IVR integration to work.
- From Setup, navigate to Users | Permission Sets
- Click on
Newbutton- Enter a Label, for example: IVR Access to SCV Apex Classes
- API Name is automatically filled out
- License: None
- Click on
Savebutton
- The new Permission Set opens
- Navigate to
Apex Class Access - Click on
Editbutton and add the following Apex classes- cnxscv.ServiceRouting
- Navigate to
System Permissions - Click on
Editbutton and enabled the following Permissions- Apex REST Services
- API Enabled
Minimum Access - API Only Integrations Profile
This Profile is used to integrate with b+s Connects for SCV to create Voice Call records and Execute Omni-Flow from the IVR flow.
The following is an example configuration and describes the minimum required permissions for the Contact Center / IVR integration to work.
This is a clone from the Minimum Access - API Only Integrations profile
- From Setup, navigate to Users | Profiles
- In the Profiles list, search for the Profile Minimum Access - API Only Integrations
- Click on the profile name to open the Minimum Access - API Only Integrations profile
- On the Minimum Access - API Only Integrations profile, click the
Clonebutton - Enter a new Profile Name, for example: SCV Integration
- Click on
Savebutton - The new Profile opens
- Verify that your Minimum Access – API Only Integrations profile has all permissions removed from the profile itself
- Navigate to
System Permissions - Make sure the following Permissions are enabled
- API Enabled
- Api Only User
SCV Integration User
The following is an example configuration and describes the minimum required permissions for the Contact Center / IVR integration to work.
No Salesforce Service Cloud Voice license or b+s Connects for SCV license is required for the SCV Integration User.
- From Setup, navigate to Users | Users
- Click on
New Userbutton- Enter First Name, Last Name, and all other mandatory fields
- User License: Salesforce Integration
- Profile: select the profile created in the previous step ("SCV Integration profile", clone of Minimum Access - API Only Integrations profile)
- Click on
Savebutton
- Open the new User record
- Assign the Permission Set License Salesforce API Integration
- Assign the Permission Set created before ("IVR Access to SCV Apex Classes")
Create the Salesforce External Client App
Configure the Salesforce External Client App that is used by Cisco Webex Contact Center.
- From Setup, navigate to Apps | External Client Apps | External Client App Manager
- Click on
New External Client Appbutton
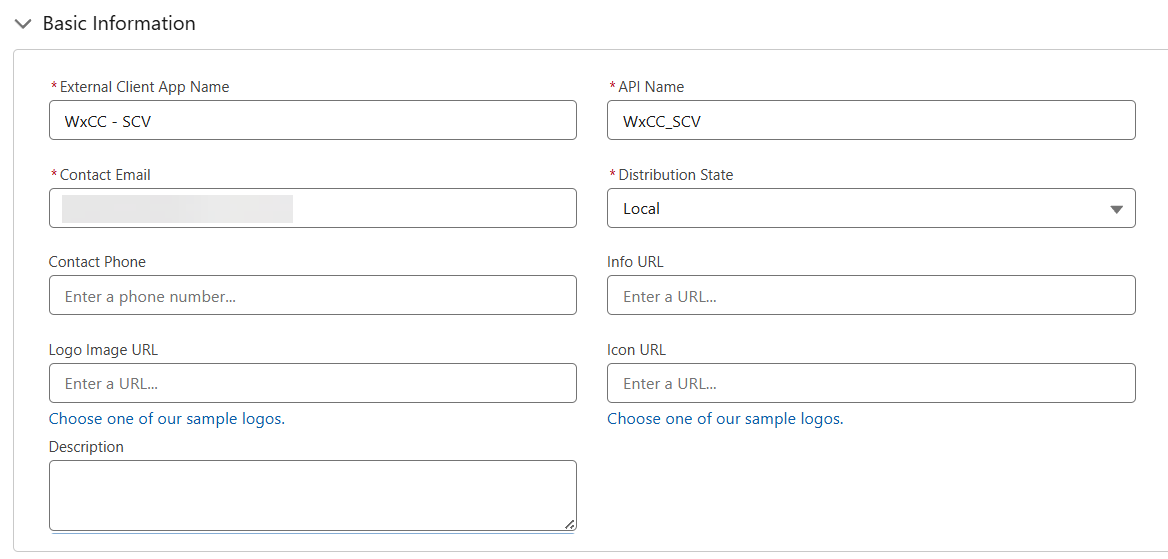
External Client App - Basic Information
- External Client App Name: WxCC - SCV
- API Name: WxCC_SCV
- Contact Email: < your email >
- Distribution State: select Local
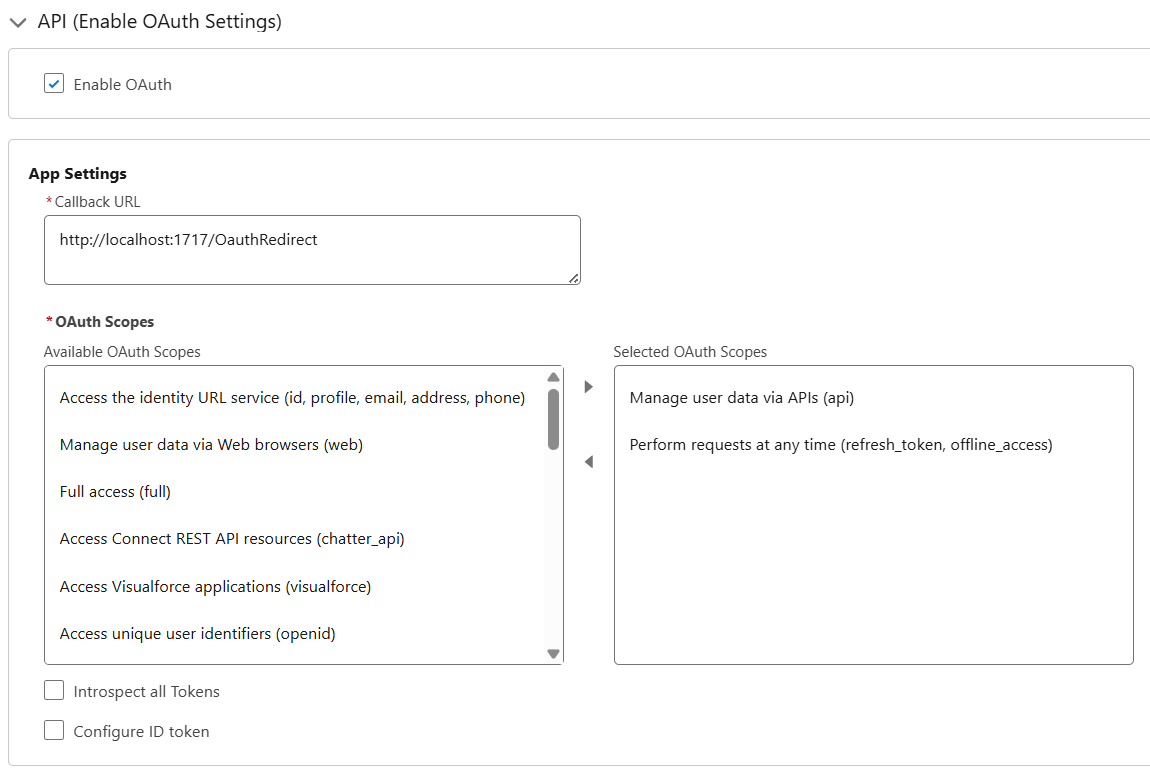
External Client App - API (Enable OAuth Settings)
- Select: Enable OAuth
- App Settings
- Callback URL: http://localhost:1717/OauthRedirect as a sample callback URL
- OAuth Scopes
- Select OAuth scopes:
- Manage user data via APIs (api)
- Perform requests at any time (refresh_token, offline_access)
- Select OAuth scopes:
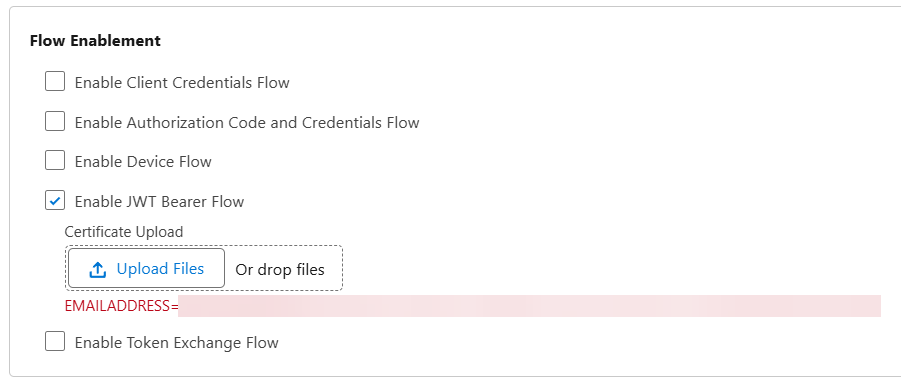
- Flow Enablement
- Select: Enable JWT Bearer Flow
- Click Upload Files and upload the
server.crtfile that contains your digital certificate (see Create a Certificate)
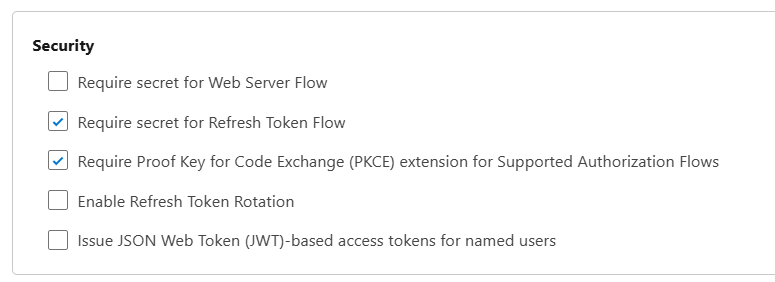
- Security
- Uncheck the Require secret for the Web Server Flow option
Click on
CreatebuttonChange to Tab
Policies- Click on
Editbutton
- Click on
Policies - OAuth Policies
- Plugin Policies
- Permitted Users: select Admin approved users are pre-authorized
- Confirm the change
- App Authorization
- Refresh Token Policy: select Immediately expire refresh token
- IP Relaxation: select Enforce IP restrictions
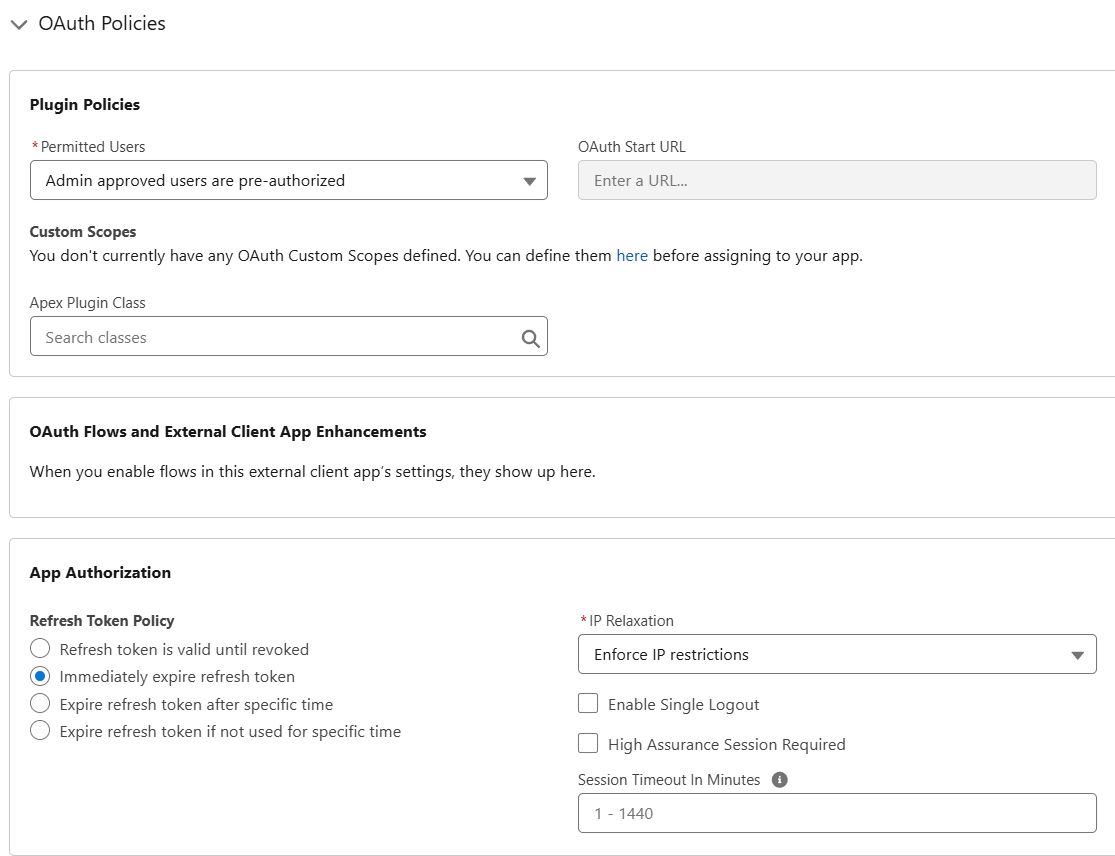
- Plugin Policies
Policies - App Policies
- Start Page: none
- Select Permission Sets: Assign the Permission Set created before ("IVR Access to SCV Apex Classes")
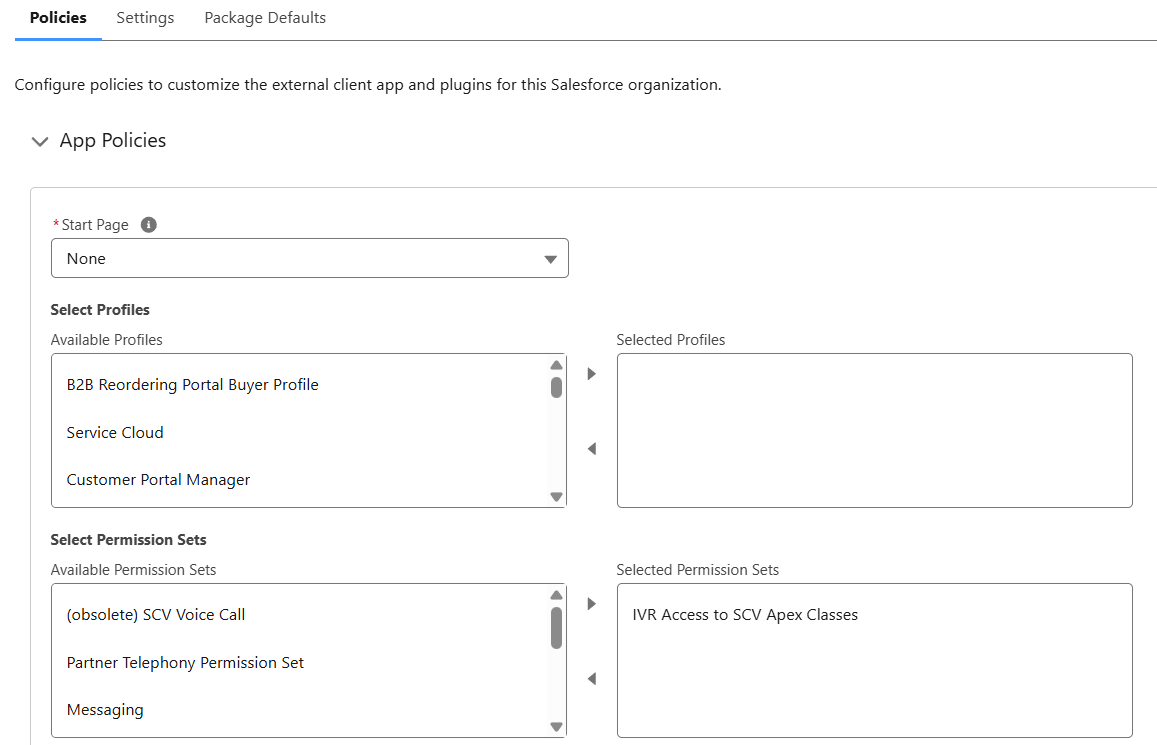
Click on
SavebuttonChange to Tab
Settings- Section OAuth Settings, click
Consumer Key and Secretbutton - wait for email and verify your identity

- A new browser tab opens a screen with the Consumer Details
- Click Copy and save the Consumer Key. The consumer key is used later to create the Salesforce Connector on Webex Contact Center Control Hub.
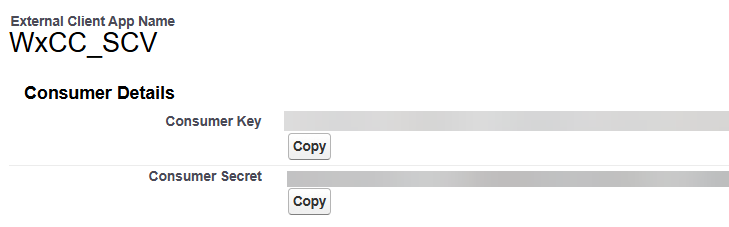
- Section OAuth Settings, click
Make sure you regularly rotate your Private Key and Certificate to keep your integrations secure.
To create a new Private Key and Certificate see Create a Certificate.
Update the Private Key in the Contact Center Connector in Webex Hub and the Certificate in the External Client App in Salesforce.