Custom Integration
Custom integrations allow customers to display or use their own code inside b+s Connects.
There are four ways to use them:
- as a view in the menu
- on the home view
- on a call
- and they can be not visible
| View | Home | Call |
|---|---|---|
 | 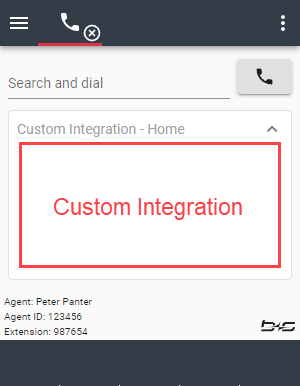 | 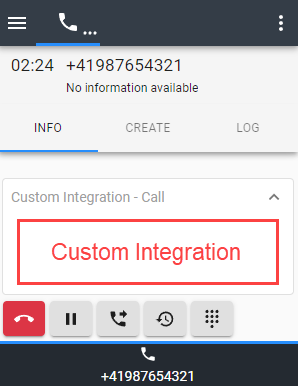 |
Only one integration can be used per location. Additional integrations will be ignored.
A Custom Integration is loaded when the agent navigates to the corresponding view and unloaded when another view is displayed. Hidden integrations are always loaded.
Configuration
Step 1: Navigate to b+s Connects for Cisco Contact Center.
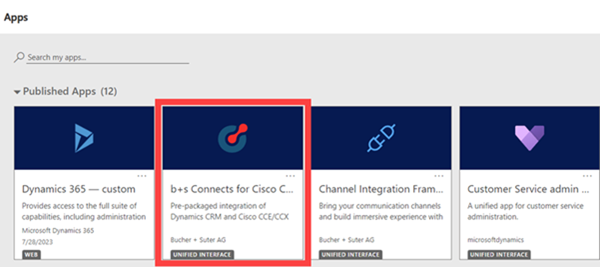
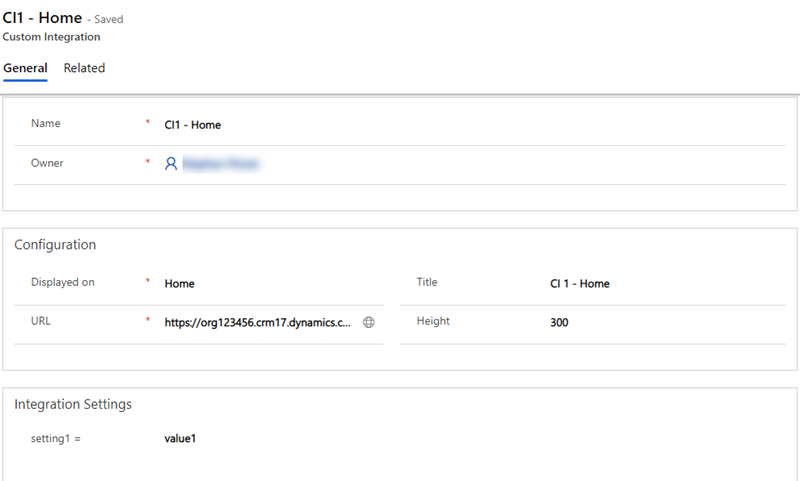
Step 2: Navigate to Custom Integrations and create a new configuration.
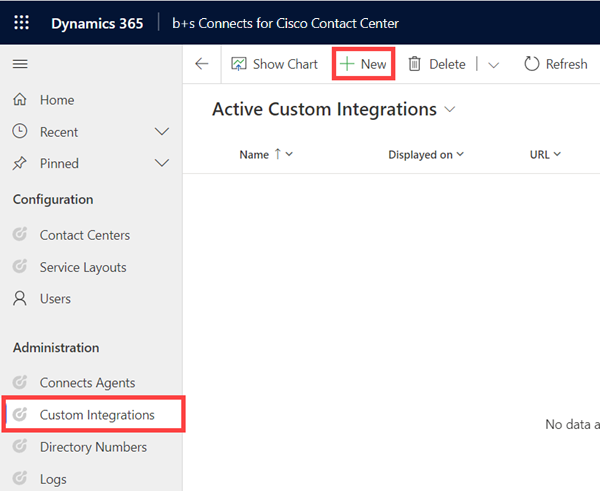
Step 3: Provide these settings:
| Name | Description |
|---|---|
Name | The name of the custom integration. |
Displayed on | Specifies where to display the custom integration. |
URL | URL of the custom integration. |
Title
The title will be displayed in the header of the card for Home and Call and as an entry in the navigation menu for View.
Height
Height of the custom integration on Home and Call.
Supported units are:
mm, in, px, pt, pc, em, ex, ch, rem, vw, vh, vmin, vmax or %.
If the provided value doesn't include a unit definition, the default is px.
For details on each unit please refer to this page.
Integration Settings
setting1 - setting5 that are available in the custom integration - max. 4096 characters per setting.
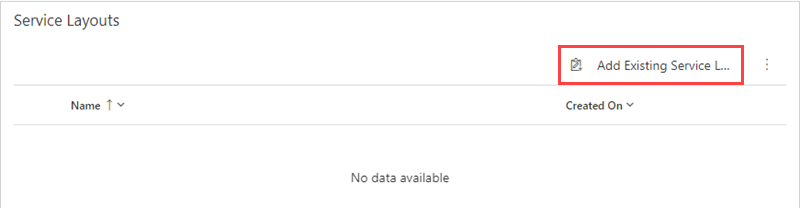
Step 4: Click on Add Existing Service Layouts.
Step 5: Search and select the desired Service Layout.
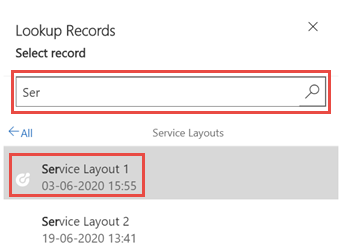
Step 6: Click Add.
Custom integrations can also be assigned with the Service Layout configuration. Further information can be found here.